Showing posts with label Battle Report. Show all posts

Sunday, August 30, 2015

Guadalcanal Table and Battle Report

Today we played the long-awaited Guadalcanal game.  Expectations were high for this one, and Rhett did not disappoint.  He definitely delivered a very tight scenario with solid mechanics that conveyed the situations in which the USMC and Imperial Army historically found themselves in this fight.

The scenario was intended to represent the final Japanese offensive against the Henderson Field perimeter.  While the wargame was definitely representational rather than literal, it certainly captured the feeling of the USMC gaining dominance on the island while the Japanese hurl the last of their dwindling, but very hard-hitting force against a tough defensive position.  It was a very fun game.

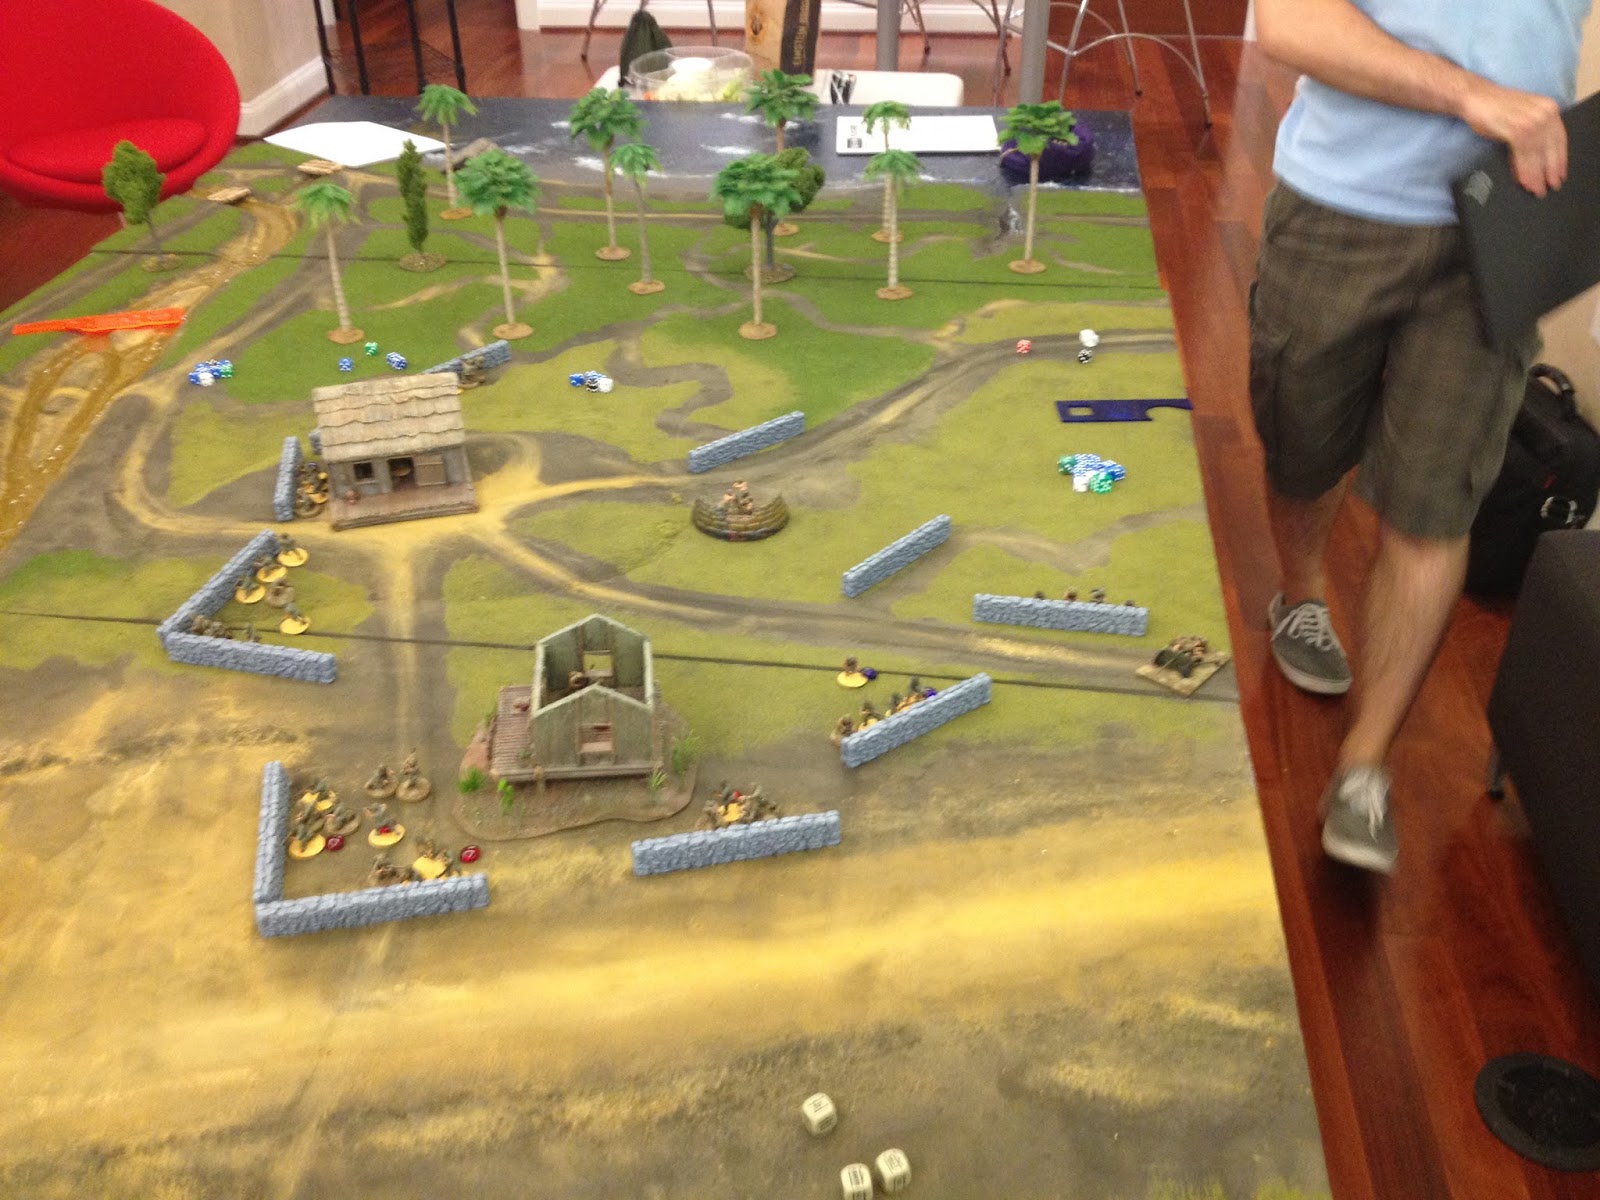
First things first, though, here's how the table turned out.  It was OK.  If the Lungga river looked more like muddy water and less like butterscotch pudding left too long in the sun, it would have been a really great table.

The waves worked pretty well.  I used snow flock to produce bubbly wakes trailing out behind each wave.  Definitely lends motion to the ocean panel.  I ended up applying three coats of acrylic gloss medium over the initial water effect laydown.


The volcanic soil turned out to be just the right color, and I like the way the the light sienna pigment produced some dusty contrast in high-traffic areas.


The go-to move of dry pigments fixed using denatured alcohol again produced amazingly realistic runoff effects.

And then there was the river.  The sad, cracked, lumpy, bubbly Lungga River.  Well, when you are starting out not every water effect gets to be the best water effect.  This was a definite miss.  I will fix it with acrylic gloss and pigment if we end up taking this table to a competition, but for now I'm just chalking this up to a learning experience.  I think I need to use less acrylic gel medium in water effects that are meant to be smooth.


On to the game.  Gavin, Drew and I played the Japanese attackers.  Rich and Owen played the USMC defenders.  The scenario called for two attacks on successive nights.  We treated the first attack as a reconnaissance in force to see how the Marines would react to a penetration of their perimeter.  We advanced with my platoon on the right, Gavin's platoon on the left, and Drew's platoon in reserve.

Because it was a night attack scenario, no units could be targeted at a range of over 18" unless there was an illumination flare in play.  Both sides used flares to varying degrees of success.

Rich and Owen use a flare to illuminate the lead squads of the Japanese attack.

The Marine firepower took a pretty good toll on the Japanese as they advanced, but not enough to knock out any squads.

I have to say that Owen was rolling hits and wounds like a Boss today.  Definitely had the hot hand.

The first wave of Japanese assaults hits the USMC line.  Once in close combat, the Japanese were devastating and Marines started to fall like wheat before the scythe.

But the Corps had an answer for that shit: flamethrowers.  They would take a decisive toll on the attackers over the course of both attacks.

Our support position on the ridge south of the airfield did not play a decisive role in either of the attacks.  Very hard to get after the Marines in buildings and hard cover.  A few pin markers, but only one or two casualties.


The Japanese sweep the Marines from the perimeter.  In the center you can see a single Japanese soldier attacking the building with explosives, which causes sufficient damage to cause secondary explosions inside the structure, killing the Marines inside.  Boom.


This is how the first engagement ended.  The Marine perimeter is compromised, but forces are repositioning to meet the threat.  Here, the lone remaining Japanese troop, armed with explosives, is hauling ass toward the remaining structure to blow it up.  But the Marines deployed another flamethrower team and, well, that was that.


During the following day, the Marines got busy restructuring their defensive perimeter.

The Japanese launched their second attack form the same place, but narrowed our front to limit our exposure to the USMC direct fire.  Which worked very well...

...but did not work very well with regard to indirect fire.  The Marines surprised us with artillery support in the second attack, which played holy hell with our densely-packed attack column.

Even with the addition of infiltration teams (our game 2 surprise) flanking along the river to the West to take advantage of the Marines repositioning to meet our main attack, the second game was never really in question.  The initial Japanese assault hit very hard and again cleared-away the first line of USMC defenders, but the Marines had more than enough capability left to recover and deal with the attackers.  Flamethrowers.  Daaaaaamn.


The victors and the GM.  Well-played, fellas.


All in all this was a very fun game with finely-crafted special rules.  Big props to Rhett for a high-quality event.  During the post game discussion we talked about the challenges GMs face in developing scenarios that remain true to history while at the same time keep players emotionally invested in the outcome.  As Gavin rightly pointed out, no battle is ever balanced and fair.  Any general that seeks a fight with even odds is doing war wrong.  Turing that imbalance into a fun wargame is our art form.


Thursday, June 4, 2015

Bolt Action Battle Report: Sollum, January 1942

Been looking forward to this battle report for a while.  I'm not going to capture the whole fight in detail, but I will relay the critical bits that I saw as the GM.

This past weekend our gaming group played a North Africa scenario on the table that John and I built over the past few weeks.  At the risk of sounding self-congratulatory, the table looked really good and I was eagerly anticipating this game.

Here are some shots of the table set-up for the game.  The South Africans would enter and advance from the high ground on the left of the photo.  Their objective was the port on the right side of the photo.


We used a scenario generally based on the 8th Army assault against the besieged Deutsches Afrika Korps garrison in the small frontier port of Sollum in January 1942.  It was one of the final acts of Operation Crusader.  Our scenario was designed to capture the flavor of a small, desperate force trying to hold out against a larger attacking force.

The defenders represented a single platoon from the 300th Oasis Reserve Battalion defending in urban terrain.  Their mission was to interdict the 8th Army forces attacking toward the port.  The DAK platoon was comprised of a platoon HQ and four infantry squads:

HQ:
Veteran 1st Lieutenant
1 Veteran Rifleman
2 Veterans with SMGs
1 Veteran Light Mortar Team

1st Squad:
Veteran NCO w/ SMG
2 Veteran LMG teams
3 Veteran Riflemen

2nd Squad:
Veteran NCO w/ SMG
Veteran LMG Team
5 Veteran Riflemen

3rd Squad:
Veteran NCO w/ SMG
Veteran LMG Team
5 Veteran Riflemen

4th Squad
Veteran NCO w/ SMG
Veteran w/ SMG
Veteran LMG Team
4 Veteran Riflemen


The DAK team consisted of one assistant GM acting as the Platoon Commander and four players, each taking the role of a Squad Leader.

To enable the kind of game play intended for this scenario we gave the DAK some game-specific special rules.  Each DAK player could break his squad into any number of 2-4 man teams.  Each of these teams would generate an activation die (this was the fundamental mechanic we used to balance the difference in activation dice between the South African company and the DAK platoon).  Each 2-4 man team had special rules that allowed them to move quickly and unseen around the game board.  In addition, 2-man rifle teams gained the sniper special rule (24" range) and also had the ability to snipe the enemy with a low chance of being detected.  Finally, small teams were allowed to break contact, which gave them the chance to shoot first, and then run away using an ADVANCE order.  The intent was to create a defense force that lacked mass, but maximized mobility, protection (buildings), and surprise.  A "death from a thousand paper cuts" kind of approach.

Which is exactly what the DAK team planned.  They devised a scheme with three squads forward and one in reserve with the platoon HQ.  The forward squads would engage and then break contact to fall back toward the port, sniping the enemy as they withdrew.

On the other side of the board was a company from the 6th Infantry Brigade, South Africa.  The mission of the South Africans was to clear a route through Sollum to the port to enable the Brigade main effort (in this case a company of Valentine tanks) to assault and seize the port.  In an effort to balance the nimble, unseen, and hard-to-kill snipers of the DAK defenders, we gave the South Africans an "Overwatch" special rule.  This allowed them to use an AMBUSH order to focus on a specific target area no more than 6" in width.  If an enemy unit fired from or moved within the target area, the Overwatching unit got to fire at that target, adding +1d6 to hit for each weapon shooting.  This rule was intended to give the South Africans powerful "hammer" to use against the "thumbtacks" of the small DAK teams.

The attackers were broken into a company headquarters and three platoons.  The company commander would be played by an assistant GM, and the platoons would each be controlled by a player.  In addition to the infantry company, we also added a tank company to represent the brigade main effort, positioned to roll into town as soon as the infantry cleared the way for them.  The tank company was controlled by two GMs, and would not actually engage in this scenario (though it was this GM's hope that the tanks' presence would frustrate the South African players, much like that scene at the end of A Bridge Too Far where MAJ Cook berates a XXX Corps tank officer for refusing to enter Arnhem).

Company HQ:
Captain
3 LMG Teams
Engineer Section (attached)
Morris Truck

3xInfantry Platoons:
HQ (2nd Lieutenant, Rifleman, Light Mortar, AT Rifle)
2x Squads (NCO w/ SMG; LMG team; 8 Riflemen)

The South Africans devised a radical plan to accomplish their task.  Instead of advancing along the intercoastal highway (as tasked in their order), they planned a sweeping maneuver around the outskirts of the city followed by a penetrating assault straight through to the port.  Casey's platoon would provide support-by-fire while Mike's platoon conducted the assault.  Dan's platoon would escort the engineers to deal with obstacles following the assault.  Rhett task-organized the company to best accomplish their assignments, loading Casey down with LMG teams and giving Mike a ton of riflemen to use in the assaults.  He would need them.  Dan had an economy of force with one squad (plus PLT HQ) to escort the engineers.

Rhett also consolidated the mortars into the company HQ, which proved critical to success as the assault proceeded.

Below, the battle begins with a toast between Mike and Dan while Casey moves his forces onto the board.  You can see the tanks of the brigade main effort on the left.  It didn't take long for their presence and inaction to frustrate the attackers.  Heh, heh.


Dan moves his breaching element onto the board while Mike fortifies himself for the assaults ahead.

Mike moves his platoon to his right flank to position for the assault.

South African infantry advancing down the escarpment toward the town.

It was right around here when Drew took the first shot of the game, dropping Casey's lieutenant with an undetected sniper shot.

Mike continues to shift his platoon to his right.

Rhett, the South African company commander and assistant GM, reacts to one of his lieutenant's requesting additional forces.  At least that's how I'm imagining this scene.


The South Africans are poised to start the assault.  Mike's forces are mobbed up on his right (our left). Casey's forces are slightly forward in the center, providing overwatch.  Dan's forces are still on the escarpment in an attempt to keep the engineers (in the truck) safe until they are needed.  Drew's snipers, now visible in the center building, prepare to break contact.

At this point the DAK started to increase the volume of their sniper fire.  Here is how we handled all the hidden setup and movement on the DAK side:
This is a screened battle board with the buildings drawn onto it.  The DAK team used it to maneuver their hidden units.  If you try this mechanic, which works well, I recommend numbering the buildings so the DAK GM can call-out the overall GM where the shots are coming from.  We spent a lot of time going back-and-forth between the table and the DAK battle board to make sure we understood what was going on.  The buildings with dark outlines are sewer nodes, which DAK forces could use to redeploy quickly from one part of the battle to another.

Below, the DAK snipers are forcing the South Africans to seek cover.  What the DAK commander wouldn't give for an air strike right about now.

Gavin and Sean started to pour in sniper and LMG fire from the right of the DAK defensive line, drawing the attention of Dan and Casey.  Drew continued to pepper Mike's advancing assault force form the DAK left, and then suddenly the South Africans were all up in the DAK's grill.

In the picture below, Mike's assault on the right sweeps Drew's DAK teams out of the front line of buildings.  On the left the South African commander uses smoke from his mortars to screen a secondary attack by Dan and Casey into the town.

The DAK were caught flat-footed by the SA assault and several sniper teams died before they could break contact.  The effective use of smoke by the South Africans allowed assaulting forces to penetrate deep into the town.  On the DAK right flank, Gavin sprung an ambush on one of Casey's squads, while Dan, in turn, plastered Gavin's ambush with an overwatching squad.  Sean did a lot of shooting and running around, which concerned the South Africans hardly at all.  Bad dice. 

But the DAK defenders recovered and fought back hard.  Keith and Drew annihilated one of Mike's squads as they assaulted their final objective without the benefit of obscuring smoke.  Birger dropped a perfect mortar shot and totally disrupted the South African attack through the center of the town.  Mike's final squad made an assault, away from the company objective and across the town center, and got cut down by one of Gavin's teams.  With Mike's platoon down, Casey and Dan assumed the assault role, with only marginally better results.  Using the sewers to redeploy undetected, Keith, Birger, and Gavin surprised the South Africans' second assault against the "hotel" with three times as many defenders as they expected to find.  This move caused more than a couple of "WTF" reactions from the South African players.  Thing of beauty.

Here, The South Africans' last assault squads are poised to continue their rampage onto the "hotel" that became the de facto final objective for both sides.  They are about to discover that there are more DAK defenders inside than the two dudes on the ledge.

In the end, the South Africans succeeded in gaining control of the hotel, but at a terrible cost; only 2 of their 9 infantry squads remained combat effective, and the remnants of the assault were in danger of being isolated deep inside the town.  Meanwhile, Dan's engineers were able to remove a couple of obstacles, but they started to take losses from DAK snipers still hidden throughout the town and would be unable to continue until additional infantry arrive to provide security for the breaching operations.  The South African commander would have had no choice at the end but to request reinforcements so he could fight his way back into the city to extract the remnants of his company before they got cut off entirely.  Meanwhile, the brigade main effort is backed-up on the intercoastal highway, unable to proceed until the route is cleared of mines and anti-tank obstacles.  The impending conversation between the South African company commander and the battalion and brigade commanders will not likely go well.

On the DAK side, they were severely bent, but not broken.  Each of their 4 squads took substantial losses.  Although there was not much fight left in them, they still possessed a few key weapon systems in good positions. They would be able to prevent the existing South African forces from breaching any more obstacles, and might succeed in isolating and destroying the remnants of the assault element in the hotel, but another company attack would likely prove too much for them without diverting reinforcements from another part of the town.

Both commanders will have some tough decisions to ponder tonight as they prepare for the next battle.

Below you can see the remnants of Dan's lone infantry squad on the South African objective at the end of the game while a nearby DAK squad prepares to cut them off from their comrades.  Dan's other squad, the engineers, remained behind (and unprotected!) to try to locate and remove mines on their own.  They quickly learned that the DAK still had weapon systems covering the obstacles.  One of Casey's squads is deployed in the background outside the town, while his last remaining squad is barely visible on the building to the far right of the picture.  Behind them, you can just make out the radio operator from the South African company HQ behind a building.  The square panels represent minefields, which the South Africans hilariously (for me at least) managed to avoid against all odds during the game.


This shot says it all.  Lots of intact obstacles on the road to the port with some lonely engineers in the backgroud, while the brigade main effort sits stalled on the highway in the distance.  It will take another company attack to rescue the remnants of the attack, and still another to clear the route, though the DAK resistance against follow on attacks will be greatly reduced.

This was a fantastic game.  Both teams enjoyed some degree of success.  While the South Africans failed to accomplish the mission assigned to them, the manner in which they executed their own rogue plan was pretty well-done, and they deserve some credit for that, at least.  Their coordination of direct and indirect fire support and obscuration allowed the assault element to get on top of the DAK defenders before they could initiate their withdrawal.  On the DAK side, redeploying teams to critical points late in the game allowed them to slow and disrupt the South African attack.  The DAK almost blew it early by waiting too long to reposition their forward squads, but they had just enough Schlitz left at the end of the game to force the South African brigade commander to change his plan.  Tactical success for the South Africans, operational success for the DAK.  The 8th Army will have to divert resources to complete this mission.

There was a lot more to it than that, and I'm sure I do not have all of the facts straight, but this report gives you a general picture of how the game went down.  Bottom line, by cheating/breaking/making rules to fit this specific scenario, the GMs gave the players a format that allowed for some fun and dynamic play between two severely imbalanced force organizations.  Going by Bolt Action army composition values, the attackers enjoyed a better than 2:1 point advantage (not counting the tanks).  After seeing the way this game went down, I would go back to a 3:2 point advantage for the attacker.  A couple of dismally unlikely assault rolls at the end of the game prevented the South Africans from sweeping the DAK off the table, resulting instead in the annihilation of Mike's platoon.  So as a GM, I got lucky with the way it worked out.

Great game, Gentlemen.

Monday, April 27, 2015

Bolt Action Battle Report-16 December, 1944. The US Army is poised to resume their offensive into Germany...

Our wargaming group played a large Battle of the Bulge scenario this weekend with Sean as the GM.  I'll try to tell the story as best I can, but this was a pretty wild one.  Apologies up front for the disorienting pictures, I was snapping them pretty quickly while trying to keep up with some really dynamic game play.  Props to Sean for the best GM led game we have experienced thus far.  He really maximized the ability of the GM to introduce tension and surprise into the game.

The scenario was the opening of the Battle of the Bulge on December 16, 1944.  The Americans (Gavin, Keith, and me) were occupying hasty defensive positions while we waited for the weather to clear enough for us to resume our attack East into Germany.  Unbeknownst to us, the Germans (Drew, Owen, and Mike), were about to launch a major attack in an attempt to penetrate our lines and capture our supply depots in order to fuel a German drive toward Antwerp.

The battlefield included three separate battle areas.  In the foreground below is the Right table, which represented a piece of the American front lines.  The center table represented a traffic control point (TCP) several kilometers to the West of the front lines.  All American reinforcements had to flow through this checkpoint.  In the background is the Left table, which represents another section of the American front lines.


The Right table looking westward along the German line of attack toward the American positions.  Drew and I would face each other on this table.

The TCP in the center.  Keith would man this with a squad of MPs.  His job was to decide whether Gavin or myself would receive activation dice when drawn.  He would also be responsible for ensuring that American reinforcements made it to the correct table.

Gavin's sector on the left where he would face-off against Owen.  With the heavier woods and frozen stream promising to slow down enemy armor, we elected to put our lone bazooka team in my sector where it would have better fields of fire.


Speaking for forces, here is what we had.  2 regular infantry platoons equipped with BARs (my platoon got a bazooka team).  One MP squad.  The reserves consisted of two regular infantry squads (one with AT grenades), a Hellcat tank destroyer, and a Sherman medium tank.


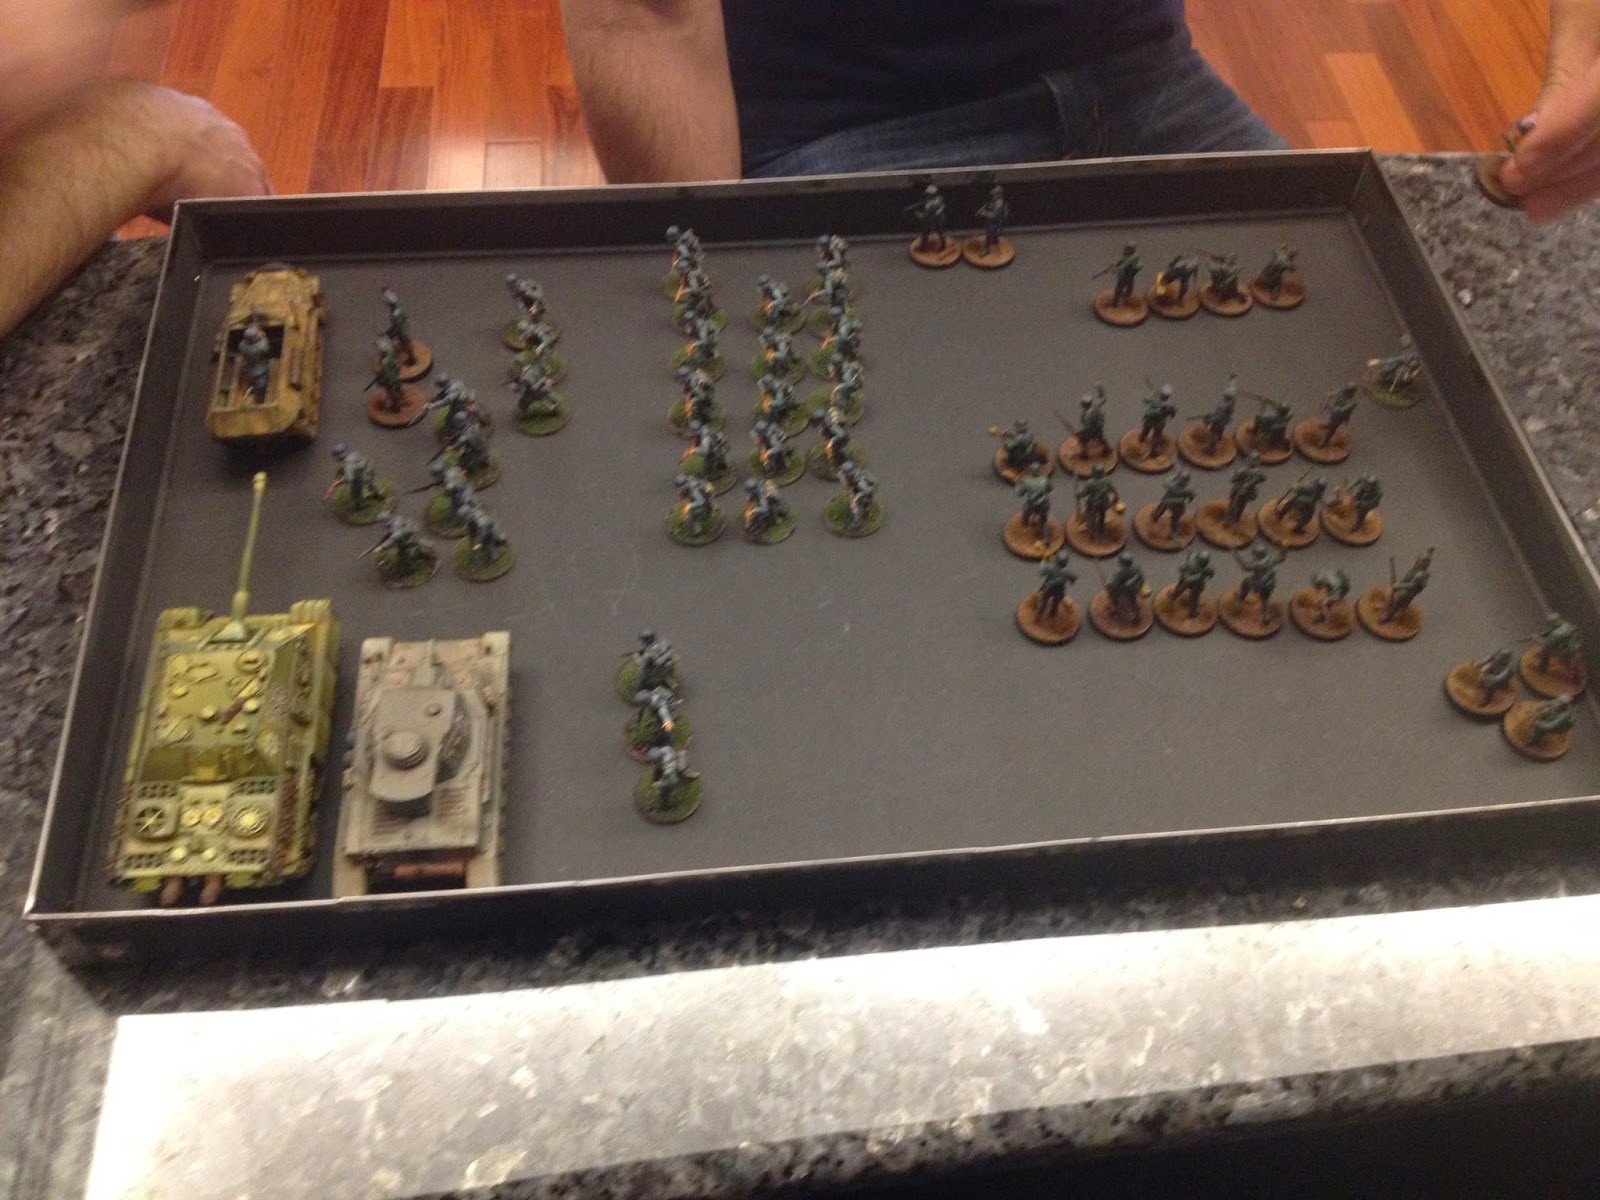
The Germans also had two infantry platoons which were a mix of regular and green troops to reflect the Volksgrenadier concept that dominated German force composition in the late war.  Their reserve included a Panzergrenadier squad with a Hanomag half track, a Panzer IV medium tank, and a Jagtpanther that we played as Jagt Tiger super heavy tank destroyer.  To reflect the force overmatch employed by the attacker, the Germans were allowed to bring their squads back onto the table as soon as they got destroyed.  Our gaming group really needs to paint more Germans.


The action opened on the left with Owen advancing his infantry platoon.  The Americans benefited from hidden setup, so Owen was probing through the forest trying to identify Gavin's defensive positions.


On the right, Drew advanced on my right flank, clearly seeking to use the woods as a covered and concealed route to get around my flank.  He flushed-out the bazooka team I had positioned in these woods, but they were able to use the intervening woods to keep from being detected by the advancing Germans.

Gavin springs an ambush and annihilates one of Owen's squads while Mike, acting as the German commander, looks on.


Over on the right, Drew has maneuvered very well and is positioned to roll my flank.  I am concerned. 


On the left the Germans fight back, hitting Gavin's ambush squad hard, but not before he takes down another German squad.  You can see Gavin's other forces revealed along the river now as they are exchanging fire with the advancing Germans.  At this point, Owen started to make some progress against Gavin's defenses, aided in part by some questionable activation die allocation by Keith.


On the right, Drew advanced one of his squads too far around my flank.  I had to spring the ambush, but I also caught him largely in the open.  His squad of green troops was annihilated and I was able to stave-off disaster.  Here, his remaining two squads prepare to use the forest to better advantage to get after my flank.


Keith kept handing me activation dice, much to Gavin's dismay, but since it allowed me to fight-off Drew's attack, I was fine with that.  Here you can see me revealing a second squad to move against Drew's attempt to flank me.


Then things started to go pear-shaped for us.  With Drew starting to run into trouble against my position, the Germans decide to bring in all their reinforcements against Gavin's position, which was now significantly weakened as a result of me getting most of the early activation dice in the turn.


Gavin is really taking it in the shorts at the hands of the overwhelming German attack at this point.  "Sure sucks to be him," I'm thinking.


Because, look!  Keith just directed a tank reserve through his TCP onto my table!  Both Drew and Gavin would suffer because of this, but hey, what did I care?  I was kicking some serious ass at this point and now I had a tank.  Woo-hoo!  Drew was bringing on more infantry squads, but I had him in a pretty good kill sack now, and I felt confident I could hold him off for the rest of the game.  Things were going really well for me--I totally have the right flank in hand.


So you know that moment at the beginning of DOOM 3 where you are taking care of some administrative business like signing into the Mars base and getting your personal stuff squared away, and its not a really big deal, then things start to go slightly awry but you don't necessarily notice it at first, and then you do notice it, and you think its kind of bad, but then you realize that it's more serious than you thought, and you think you really ought to do something about it, but when you start to do something about it you realize that, in fact, all hell has broken loose?

That moment is exactly what Sean and Keith took BOTH SIDES through in their recreation of OPERATION GREIF.  No one saw this coming.

So Keith had made some questionable decisions about die allocation, but since it all benefited me, I was happy to let it go.  Gavin was less happy, as he had borne the brunt of the German attack and was in danger of being completely defeated at this point.  I just chalked it up to Keith having a bad day and not having his head in the game (which, for those of you who know him, is very uncharacteristic.)  Then, as one of our reserve squads approached the TCP, Keith said, "and now I'm going to fire at that squad."  We all heard him, but initially dismissed it as a continuation of whatever bizarre affliction kept impeding his game play.  But then he started counting out dice, and then he started rolling them, and suddenly he was taking models, OUR MODELS off the table.

Both sides were completely stunned ant first.  Then, as the realization of what had just happened finally dawned on us, the Germans were as happy as the Americans were devastated.  Keith had been playing perfectly, misdirecting resources and generally causing havoc without anyone knowing what was going on.

Turns out that Sean and Keith had worked-out this mechanic weeks ago and now had pulled it off in spectacular fashion.  The fact that the Germans were as surprised as the Americans made it even more impactful and historically accurate.  All of us agreed that it was the high-point of the game.  Well-done fellas!

Keith's "MPs" reveal themselves to be German special operations forces and annihilate the American reserve squad.


Having sprung their trap, the German agents melted away in the Ardennes, and Gavin and I got control of our dice and our reserves, but the damage was done.  Below, Gavin gets a reserve squad and a Hellcat on his board, but it is too little, too late, and Owen and Mike destroy his forces to a man.


Over on the right, I'm feeling less smug about the wrecking job I am doing against Drew's forces, and make preparations to withdraw.


"You die, the girl dies, everybody dies."  Mike as the German commander seemingly could not fail a roll with his armored juggernaut, while the outgunned Hellcat could do nothing against the massive Tiger tank destroyer.  It was worse than it looks in this picture.


So I stopped taking pictures.

This is how the game ended.  Burning American vehicles and unscratched German vehicles.

It had the potential to be a really cool ending.  To reflect the Americans conducting a fighting withdrawal, Sean reapportioned the forces based on the outcomes of the two battle zones and had both sides roll onto the center table at the TCP to determine the winner.  We ended up with a Sherman, a Hellcat, two squads,a  bazooka team, and a lieutenant.  The Germans had a squad in a Hanomag, a Panzer IV, and that stinking Tiger tank destroyer.  I felt that we had a chance at first, but then Bolt Action happened and through extremely unlucky activation draws and poor deployment we ended up placing all of our forces on the board first-shooting gallery style. This allowed the Germans to completely control the fight, and Gavin and I stood there and watched while our forces got systematically destroyed.  We had a couple of chances for some revenge kills, but the bazooka and Hellcat were completely ineffective.  With the loss of our last vehicle, we surrendered the remnants of our force to the attacking Germans.  Counting up the victory points, we forced a draw due to the sheer numbers of German squads we destroyed in our battle zones.  As usual, the specific victory conditions were unknown to the players, which helped keep the game play focused on realistic tactics.  It worked very well.

It was a very fun and well-run game.  Sean and Keith really made everyone's day with OPERATION GREIF.  The ending was a bit of a wet firecracker, but that was due mainly to the Bolt Action activation mechanic.  We had a good post game discussion about whether to limit chain activations.  While I understand why some players would prefer to mitigate the potential for sudden disaster by placing limits on activations, I think the fog of war and uncertainty that the Bolt Action activation mechanic brings to wargaming is one of the best things going right now.  Then there is the ambush order question over whether you prefer to retain the ability to react at the expense of the likelihood of getting an activation.  Decisions over how to set conditions for the activation dice are a big part of the game.  I am willing to suffer through an ignominious defeat due to bad fortune, knowing that I have and will continue to benefit from good fortune in turn.  It is all part of the game, and contributes to a dynamism and tension that predictable activation lacks.  Not knowing who goes next is huge.  I guess it is the closest we can come to experiencing some degree of fear in our games, which is an interesting component of warfare vice wargaming to consider.