Sunday, August 30, 2015

Guadalcanal Table and Battle Report

Today we played the long-awaited Guadalcanal game.  Expectations were high for this one, and Rhett did not disappoint.  He definitely delivered a very tight scenario with solid mechanics that conveyed the situations in which the USMC and Imperial Army historically found themselves in this fight.

The scenario was intended to represent the final Japanese offensive against the Henderson Field perimeter.  While the wargame was definitely representational rather than literal, it certainly captured the feeling of the USMC gaining dominance on the island while the Japanese hurl the last of their dwindling, but very hard-hitting force against a tough defensive position.  It was a very fun game.

First things first, though, here's how the table turned out.  It was OK.  If the Lungga river looked more like muddy water and less like butterscotch pudding left too long in the sun, it would have been a really great table.

The waves worked pretty well.  I used snow flock to produce bubbly wakes trailing out behind each wave.  Definitely lends motion to the ocean panel.  I ended up applying three coats of acrylic gloss medium over the initial water effect laydown.


The volcanic soil turned out to be just the right color, and I like the way the the light sienna pigment produced some dusty contrast in high-traffic areas.


The go-to move of dry pigments fixed using denatured alcohol again produced amazingly realistic runoff effects.

And then there was the river.  The sad, cracked, lumpy, bubbly Lungga River.  Well, when you are starting out not every water effect gets to be the best water effect.  This was a definite miss.  I will fix it with acrylic gloss and pigment if we end up taking this table to a competition, but for now I'm just chalking this up to a learning experience.  I think I need to use less acrylic gel medium in water effects that are meant to be smooth.


On to the game.  Gavin, Drew and I played the Japanese attackers.  Rich and Owen played the USMC defenders.  The scenario called for two attacks on successive nights.  We treated the first attack as a reconnaissance in force to see how the Marines would react to a penetration of their perimeter.  We advanced with my platoon on the right, Gavin's platoon on the left, and Drew's platoon in reserve.

Because it was a night attack scenario, no units could be targeted at a range of over 18" unless there was an illumination flare in play.  Both sides used flares to varying degrees of success.

Rich and Owen use a flare to illuminate the lead squads of the Japanese attack.

The Marine firepower took a pretty good toll on the Japanese as they advanced, but not enough to knock out any squads.

I have to say that Owen was rolling hits and wounds like a Boss today.  Definitely had the hot hand.

The first wave of Japanese assaults hits the USMC line.  Once in close combat, the Japanese were devastating and Marines started to fall like wheat before the scythe.

But the Corps had an answer for that shit: flamethrowers.  They would take a decisive toll on the attackers over the course of both attacks.

Our support position on the ridge south of the airfield did not play a decisive role in either of the attacks.  Very hard to get after the Marines in buildings and hard cover.  A few pin markers, but only one or two casualties.


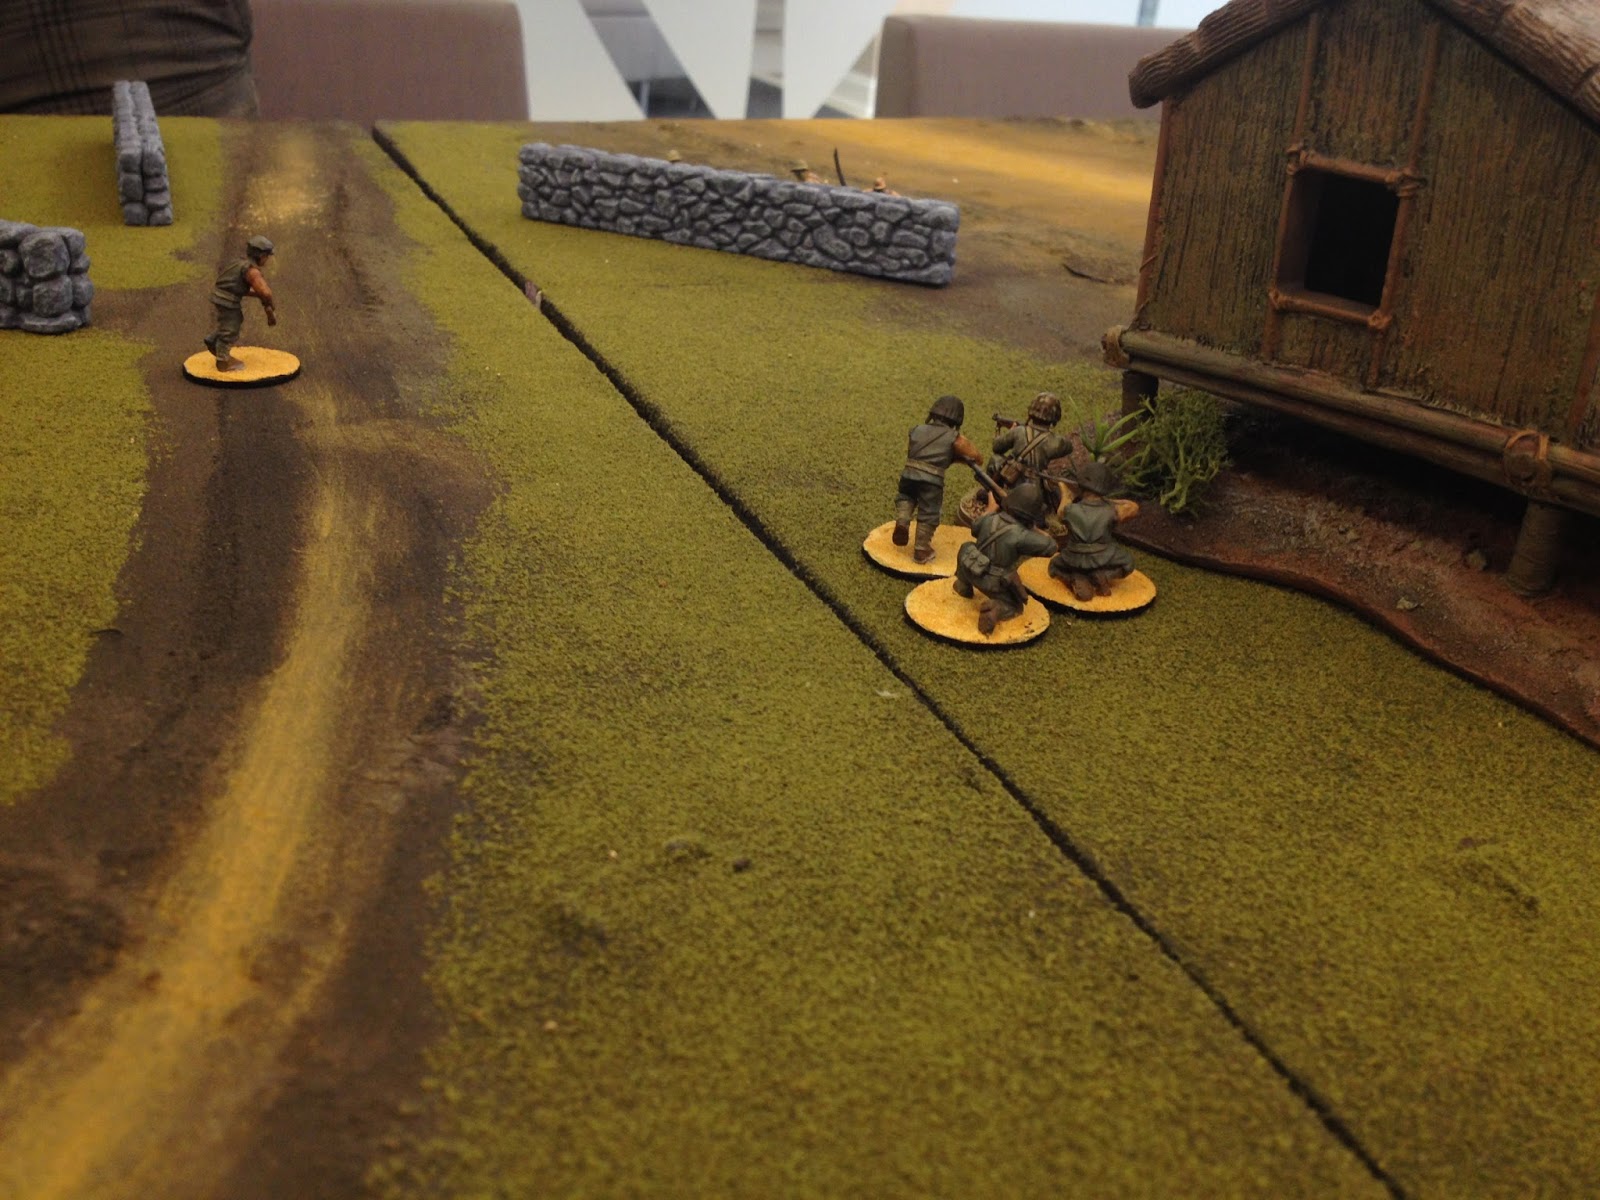
The Japanese sweep the Marines from the perimeter.  In the center you can see a single Japanese soldier attacking the building with explosives, which causes sufficient damage to cause secondary explosions inside the structure, killing the Marines inside.  Boom.


This is how the first engagement ended.  The Marine perimeter is compromised, but forces are repositioning to meet the threat.  Here, the lone remaining Japanese troop, armed with explosives, is hauling ass toward the remaining structure to blow it up.  But the Marines deployed another flamethrower team and, well, that was that.


During the following day, the Marines got busy restructuring their defensive perimeter.

The Japanese launched their second attack form the same place, but narrowed our front to limit our exposure to the USMC direct fire.  Which worked very well...

...but did not work very well with regard to indirect fire.  The Marines surprised us with artillery support in the second attack, which played holy hell with our densely-packed attack column.

Even with the addition of infiltration teams (our game 2 surprise) flanking along the river to the West to take advantage of the Marines repositioning to meet our main attack, the second game was never really in question.  The initial Japanese assault hit very hard and again cleared-away the first line of USMC defenders, but the Marines had more than enough capability left to recover and deal with the attackers.  Flamethrowers.  Daaaaaamn.


The victors and the GM.  Well-played, fellas.


All in all this was a very fun game with finely-crafted special rules.  Big props to Rhett for a high-quality event.  During the post game discussion we talked about the challenges GMs face in developing scenarios that remain true to history while at the same time keep players emotionally invested in the outcome.  As Gavin rightly pointed out, no battle is ever balanced and fair.  Any general that seeks a fight with even odds is doing war wrong.  Turing that imbalance into a fun wargame is our art form.


Friday, August 28, 2015

Things that Matter in Wargaming

I was looking for a pirated copy of WSS #78 so I could share the full text of Phil Dutré's excellent article, 'The irregular - It's the figures, stupid!'.  While searching (and failing), I came across this gem posted on Big Andy's.

Always fun to encounter those with a healthy perspective on the range of possibilities our shared hobby offers beyond the tournament.


Back to  Dutré's article, reading it reminds me of one of the most distrurbing trends I encountered while slogging around in the 40k scene: people building an army tooled-up for the current edition and then discarding it on eBay once it was no longer the 'it' army build.  I understand the constraints of budget, especially with regard to obscenely overpriced GW product, but this practice occupies the same piteous place in my heart where I contemplate destitute unfortunates selling their blood to buy food.

I do believe that people for whom the miniatures are simply a means to an end are missing out on one of the greatest elements of our hobby.

And Andy, I'm with you, Sir.  Wargaming without umpires is like drinking beer without beer.

Friday, August 21, 2015

Guadalcanal Table Part 2

So, things are not going real well.

I tested super heavy acrylic gloss gel medium, and I thought it would work great, which it would, if I had three months to let the gel dry and clarify.  Not going to work this time around (although I am excited about the prospect of working in heavy gel medium in the future.)

Here is what the test panel looks like with a thick schmear of super heavy gloss gel.  I'll show you another picture in late Autumn, it may have dried by then.


But now I am out of time.  I could go small and lame and douse the water with varnish and call it good.  But that's not my style.

I really want to make the spot where the muddy water of the river mixes with the clear ocean water work, and the only way to do that is with a medium that gives some depth to the water effect.  I went back to the art store and bought some Liquitex medium acrylic gloss gel and a tub of acrylic gloss medium/varnish.  I mixed about one part gel to two parts varnish, and rolled the dice.

I kind of sucked.  Applying the gel totally disrupted the modulation pattern I had carefully laid down with the blue pigments and turned the whole ocean part into hodge-podge impressionist seascape.

Nothing to do but move forward.

I next mixed about 1 part gel with 4 parts varnish and about a half-tablespoon of light sienna pigment, and carefully poured the river.  This went OK, but I am very nervous that it will dry with a concave surface (if it dries with any body depth at all).  I have also accepted the reality of bubbles in the river due to mixing the medium, but I'll worry about those later (I went through and popped the big ones).

Thoroughly dissatisfied with the way the ocean looked, I scooped some medium gel medium directly onto it, sprinkled the lumps liberally with snow flock (foam and bubbles), and stirred them into waves using a toothpick and a "sideways tornado" stirring motion to replicate water turning in waves.  Finally, I filled the lagoon with acrylic gloss medium.  I have absolutely no idea what I am doing at this point.  Here's how it looks right now:


If I am very lucky, the waves will dry and clarify by game time next Sunday.  The river and lagoon should dry in a couple of days, so I can go back and fix them if they are too assed-up to live with.

Alia iacta est.  Tune in in early September to see how it turned out.

Sunday, August 16, 2015

Guadalcanal Table Part 1

I've been working on a table for Rhett's Guadalcanal Game for a couple of months.  Compared to the North Africa table, this one has been pretty straightforward, with the exception that I need to figure out how to make a good blue water pacific beach.

I started out with three 3'x5' wood panels and glued 1' thick pink foam to them.  Then I carved out the beach, a lagoon ("alligator creek") and the Lungga River using a wire brush.  I had some spare hills lying around, so I glued one to the table to represent the high ground near Henderson Field.


Studying satellite images of the island, I went with a dark green textured paint as a base color to represent the dark volcanic soil.


I then applied dark pigment for the roads and slightly lighter pigment for the soil.  I used ochre colored pigments for the riverbed.


Fixed the pigment with denatured alcohol.  Great stuff.

I Let all that dry in the basement for a good long while while I went on vacation in Maine with my family.


Back from Maine, I added flock to the panels.  I used some Woodland Scenic stuff that has been in the basement for years, and I cannot remember what colors I bought, but I used dark green for the jungle areas and a light green (burnt grass, maybe) for the open areas near the airfield.


Layered and blended blue pigments on the ocean parts, leaving the runoff from the Lungga River flowing into the sea.

I used ochre pigment to replicate vehicle wear on the roads.

Now I am faced with a water effects project the likes of which I have not tried yet.  Going to do some testing with acrylic gloss gel medium and then go for it later this week.  This needs to be dry and ready for the game in two weeks.  Stay tuned.

Tuesday, August 4, 2015

WIP: Virtue for the 2015 NOVA Narrative

NOVA 2015 is fast approaching, so it is high time I got to work painting the exciting new Virtue model created for the NOVA Narrative.  Thanks Mike!

Cleaning the model did not go well, as I uncovered a gaping air pocket in the human's head as I scraped off mold lines.  Unfortunately, the resulting hole obliterated the model's right eye, which is beyond my sculpting skills to repair, so I am just going to proceed and pretend it is not there (and take pictures from the left side).

I am going to use an additive layering technique for this model, which is something I have not tried since I was a kid.  We will see whether my application of the technique has improved at all over time.

I started the model off with the basic palate of blue and brown undercoats and will build from here.  I want the human to represent, literally, earth (his warm palate will blend with the earth tones planned for the base) while the Virtue warrior will provide a cold contrast of blue and silver metallics to signify the other-worldliness of the Virtue.

Here's the model with the undercoat.
Primer: P3 spray white
Virtue: P3 Coal Black/water/flow enhancer 4:2:2
Human: P3 Umbral Umber/water/flow enhancer 6:3:1


Updated picture: 6 August, basecoat
All paints diluted 50% with water.
Virtue armor plates: P3 Pig Iron
Human uniform fabric: P3 Thornwood Green
Human armor plates: P3 Cryx Bane Base
Human pouches and straps: P3 Cryx Bane Highlight

Updated picture 13 August, highlights and finish
Virtue-
Armor highlight 1: Reaper Honed Steel
Armor highlight 2: Vallejo Model Color Silver
Armor finish: Very dilute glaze of P3 Coal Black with additional coats in shaded areas.  Went back and hit select plates with silver over the glaze to add some variety and movement to the plates.

Human-
Uniform highlight: P3 Gun Corps Brown
Armor highlight: P3 Traitor Green
Pouch and Straps highlight: P3 Trollblood Highlight
Flesh: P3 Midlund Flesh with Citadel Leviathan Purple wash
Hair: Citadel Chestnut Wash Ink

The base is a mess of Secret Weapon pigments fixed with mineral spirit.  Violet pigment on the bottom and in the cracks; my own mix of dark green pigment on the slate tiles; yellow, clay, and bright sand pigment on the pillars.

This may be as far as I get with this one.  If I have time I will touch up the base and add some icons to the Human's armor, but I'm probably going to call this done and move on to another looooong neglected project.


Updated update...I had to fix that base...